Dog groomer working at an adjustable grooming table in an ergonomic salon setup, showing healthy posture and professional equipment.

Back Pain Is Not Part of the Job: Groomer Ergonomics Guide

, 24 min reading time

An in-depth ergonomics guide for professional groomers. Learn how to set the ideal grooming table and bath height, choose and adjust an ergonomic grooming chair, protect your wrists and back, design a healthier salon layout and build daily routines that extend your grooming career by 10+ years.

Back Pain Is Not Part of the Job: The Ultimate Ergonomics Guide for Professional Groomers

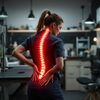
Many groomers quietly accept back pain, tingling fingers and evening exhaustion as “just part of the job”. It is not. Professional dog grooming is a physical craft that combines strength work (lifting dogs, handling large breeds) with micro-precision (scissoring, clipper work, dematting). That makes groomers closer to athletes and surgeons than to typical desk workers.

Most long-term injuries in our industry do not happen because grooming is “too hard”. They happen because the body is forced to work in bad conditions: tables at the wrong height, non-adjustable tubs, heavy hand dryers, dull tools, poor footwear, no breaks. The good news is that grooming ergonomics is not a luxury. It is a system you can build step by step to protect your back, wrists, shoulders and neck – and realistically extend your grooming career by 10+ years.

This guide is written for professional dog and cat groomers, salon owners and serious home-based groomers who want to work smarter, not just harder. We will cover workstation setup, grooming table height and bath ergonomics, tool selection, injury prevention, daily movement routines and long-term strategies to keep your body strong, mobile and pain-free.

1. Why We Need to Talk About Groomer Ergonomics

Grooming ergonomics is still a taboo topic in many communities. New groomers often hear phrases like:

  • “Everyone’s back hurts, it’s normal.”
  • “Get used to sore wrists, that’s grooming life.”
  • “If you’re tired, you’re just not tough enough.”

This mindset is dangerous. When pain is normalized, early warning signs are ignored:

  • Stiff lower back after the first dogs of the day.
  • Tingling fingers at night after heavy scissoring days.
  • Burning sensation in the shoulders after drying a few double coats.
  • Neck tension and headaches after leaning over the table for hours.

These are not minor inconveniences. They are the first stage of repetitive strain injuries and musculoskeletal disorders that can end a grooming career years earlier than necessary. They can also reduce your speed, quality, patience and income.

The purpose of this guide is to reframe grooming from “pain is inevitable” to “pain is feedback that something in the system needs to change”. Dog grooming ergonomics is that change: the art and science of designing your workspace and habits so your body can perform at its best, day after day, year after year.

2. The Anatomy of Grooming Pain: What Actually Goes Wrong?

To build a healthier grooming practice, it helps to understand what is actually happening inside your body when you work. The most common problems for groomers include:

  • Lower back pain: from bending over tables and tubs, lifting with a rounded spine, and standing on hard floors.
  • Neck and shoulder tension: from leaning forward, reaching too far, holding dryers or tools above shoulder height.
  • Carpal tunnel syndrome and tendonitis: from repetitive scissoring, brushing, clipping and blow-drying with poor wrist angles.
  • Hip and knee discomfort: from standing all day, twisting, and working on uneven or slippery surfaces.
  • General fatigue and burnout: from working in a constant state of physical stress without recovery strategies.

These issues do not usually appear overnight. They build up slowly:

  1. Small, repeated movements done in poor alignment.
  2. Static positions held too long (for example, leaning over a table while scissoring legs).
  3. Insufficient rest and no active recovery (stretching, strengthening, mobility work).
  4. Tools or equipment that force the body to compensate.

The goal of ergonomics is to address these root causes, not just the symptoms. We want to:

  • Improve posture and joint alignment during grooming tasks.
  • Reduce unnecessary load on muscles and joints.
  • Upgrade tools and equipment to support natural body mechanics.
  • Build strength and mobility so the body can handle the demands of grooming.

3. Your Grooming Workspace as a Biomechanical System

Ergonomics is not only about buying a comfortable chair. It is about designing a system in which every element of your grooming workspace supports your body instead of fighting it. Think of your salon or home setup as a biomechanical flow:

Bath & lifting → Table work → Drying → Detailing & scissoring → Cleaning & resetting

At each step, your equipment and habits can either protect your back, wrists and shoulders, or overload them. Let’s break down the core elements: the grooming table, seating, bathing area and drying setup.

3.1. The Grooming Table: Your Spinal Anchor Point

One of the biggest ergonomic mistakes is working at a table that is always at the same height. Groomers then bend over small dogs, reach up for tall breeds or large doodles, and twist their spine to reach different areas. This is one of the main reasons back pain in groomers is so common.

The basic rule is simple: the table must come to you, not the other way around.

Key principles for grooming table ergonomics:

  • When grooming the main body, your elbows should sit roughly at a 90-degree angle, with shoulders relaxed and spine neutral. This allows the wrists, elbows and shoulders to work in a safe range.
  • When working on legs and feet, the table should be higher, so you do not need to bend or squat constantly. Instead of lowering your body, raise the dog.
  • Your head should stay stacked above your shoulders, not jutting forward over the dog. Even a few centimetres of forward head posture significantly increases the load on the neck.

How to calculate ideal grooming table height

Many groomers ask: “How high should a grooming table be?” There is no single number, but you can use a simple formula to find your personal ergonomic range.

  1. Stand upright in flat shoes on a firm surface.
  2. Relax your shoulders and bend your elbow to 90 degrees, as if you were holding scissors over the dog’s back.
  3. Measure the distance from the floor to your elbow. Call this number E (elbow height).

For most groomers, ideal grooming table height for body work is:

Table height ≈ E − 5 to 10 cm

Example: A groomer with an elbow height of 105 cm will often feel comfortable with a table height of around 95–100 cm when working on the dog’s body. For leg work and detailed scissoring, the table can be raised closer to elbow height or even slightly above.

For very small dogs and cats, you may prefer the table closer to elbow level. For very large dogs, you may accept a slightly lower height to keep the dog stable and comfortable, but should still avoid deep forward bending.

Adjustable electric or hydraulic grooming tables are therefore more than a luxury; they are long-term health investments. When choosing a table, look for:

  • A wide height range that suits your own height and the breeds you handle most.
  • A stable “Z” or double-scissor lifting mechanism to minimize wobble.
  • A low entry height so large or elderly dogs can step on without you lifting them from the floor.
  • A non-slip surface to prevent constant micro-adjustments as the dog slips.

If you often search for “grooming table height chart” or “dog grooming table setup”, remember that the most accurate chart is the one based on your own elbow height, your shoes and the types of dogs you groom.

3.2. Sitting or Standing: Finding the Healthy Balance

Many groomers believe they must either stand all day or sit all day. In reality, the healthiest pattern is a hybrid strategy: alternate between sitting and standing throughout the day.

Standing all day can contribute to:

  • Varicose veins and circulation problems.
  • Foot, knee and hip pain.
  • Lower back fatigue from static posture.

Sitting all day can lead to:

  • Compressed lower back discs.
  • Rounded shoulders and neck strain.
  • Reduced overall movement and stiffness.

A good ergonomic grooming setup allows you to:

  • Stand for brushing, drying and larger movements.
  • Sit (for example, on a saddle stool) for detailed face, feet and leg work.
  • Change position every 15–30 minutes to prevent muscular fatigue.

Choosing and adjusting an ergonomic grooming chair

For many groomers, the best option is an ergonomic grooming chair or saddle stool. This type of seat:

  • Encourages a natural curve in the lower back instead of a rounded slouch.
  • Opens the hip angle (often around 110–130 degrees instead of 90), reducing pressure on the lumbar spine.
  • Allows you to roll close to the grooming table without banging your knees.
  • Makes it easier to switch between sitting and standing during a groom.

To set the correct seat height, use this simple guideline:

  1. Sit on the stool with your feet flat on the floor.
  2. Your knees should be slightly lower than your hips, not higher.
  3. Your spine should feel naturally upright, with no need to lean back or hunch forward.

In basic terms, you can think of an approximate formula:

Seat height ≈ knee height + 5–10 cm

The exact number will vary depending on your body proportions and the type of saddle seat, but if your hips are clearly higher than your knees and your feet are solid on the floor, you are likely in a good ergonomic zone.

When searching for a “best grooming chair” or “ergonomic groomer stool”, prioritize adjustability, seat shape and stability over color or style. Your chair is part of your injury-prevention toolkit.

3.3. The Bathing Zone: Where Many Serious Injuries Begin

Lifting and bathing are some of the most physically demanding parts of grooming. A 30 kg Golden Retriever lifted incorrectly into a high tub can be a direct path to a muscle strain or even a disc injury.

To protect your back:

  • If possible, use an electric-lift tub that can be lowered close to the floor so the dog can step or walk in, and then raised to a comfortable height for washing.
  • If you use a fixed-height tub, install secure, non-slip ramps or steps so large dogs can climb in with minimal assistance.
  • Never lift heavy dogs alone if you can safely avoid it. Ask for help with giant breeds or injured/elderly animals.
  • When lifting is unavoidable, use proper lifting mechanics: feet shoulder-width apart, bend at the knees, keep the dog close to your body, and drive upward with your legs, maintaining a straight back.

How high should a dog grooming bath be?

The ideal dog grooming bath height is similar in principle to grooming table height: it should allow you to wash and rinse the dog without rounding your back or lifting your shoulders toward your ears.

  1. Again, measure your elbow height (E) while standing in your usual grooming shoes.
  2. For most groomers, the top edge of the tub (rim) should be slightly below elbow height.

A good starting point for comfortable washing is:

Bath rim height ≈ E − 10 to 15 cm

This allows you to keep your spine neutral while washing the dog’s back and sides. For smaller dogs, a raised platform or insert inside the tub brings the dog up to a more ergonomic height. For very large dogs, you may accept a slightly lower working height, but should still avoid deep forward bending and twisting.

If you are comparing ergonomic dog grooming baths or tubs, ask:

  • What is the minimum and maximum working height (for lift tubs)?
  • How easy is it for large dogs to enter (door, ramp, step)?
  • Is there enough room to move around the dog without twisting awkwardly?
  • Is the floor of the tub non-slip for both dog and groomer?

In the tub area, consider non-slip mats and anti-fatigue flooring around the bathing zone to reduce slip risks and joint stress. These small additions make a big difference when you repeat bathing movements hundreds of times each month.

3.4. Drying: The Shoulder and Wrist Killer

Holding a hand dryer above shoulder level for long periods almost guarantees shoulder and neck problems over time. Repeated wrist snapping movements with a heavy dryer can also contribute to tendonitis.

Ergonomic drying strategies:

  • Use stand dryers whenever possible so your hands are free to brush and comb instead of supporting weight.
  • Consider wall-mounted blowers or ceiling arms that hold the hose for you.
  • Position the dryer so air flow follows the coat direction without forcing you into awkward angles.
  • Alternate hands when possible and avoid holding the dryer with a bent wrist. Keep the wrist neutral, moving from the shoulder and elbow instead.
  • Use appropriate temperature and air speed to reduce drying time without overheating the dog or your own arms.

4. Tools and Micro-Movements: Protecting Wrists, Elbows and Hands

Repetitive small movements are at the heart of grooming: scissoring, clipper work, brushing, dematting, combing. The wrists, fingers and elbows are under constant load. Carpal tunnel syndrome, trigger finger, tennis elbow and general hand fatigue are some of the most common groomer complaints.

4.1. Scissors: Every Gram Matters

Scissors are an extension of your hand. Poorly chosen or dull scissors can triple the effort needed for each cut. Over hours and years, that translates into chronic strain.

When choosing and using grooming scissors:

  • Pay attention to weight. Lighter scissors, especially with ergonomic handles, reduce the cumulative load on your hand and wrist.
  • Look for offset or crane-style handles that minimize awkward wrist angles and keep your hand in a more natural, neutral position.
  • Swivel-thumb scissors can allow your wrist to move more freely and follow the coat without twisting your forearm.
  • Keep scissors sharp. Dull blades require more grip force and more repetitions. Regular sharpening is a health measure, not just a quality measure.

4.2. Clippers: Vibration, Weight and Grip

Clipper work may seem harmless, but vibration, weight and grip all contribute to stress on the hands and elbows.

To make clipper work more ergonomic:

  • Choose clippers with lower vibration and a comfortable weight for your hand size.
  • Avoid gripping the clipper too tightly; let the tool do the work.
  • Use comb attachments appropriately so you are not forced to go over the same area many times.
  • Keep blades sharp and clean to reduce drag and resistance.
  • Switch hands occasionally for easier areas to balance the load, if you can do so safely.

4.3. Brushes and Combs: Technique Over Force

Many groomers overuse force when brushing, especially when dealing with mats. Pushing too hard into the coat, especially with a stiff slicker, not only irritates the dog’s skin – it also strains your wrist and hand.

Ergonomic brushing principles:

  • Use the right brush for the coat type and condition.
  • Work in small sections using line brushing, rather than attacking large areas with big strokes.
  • Let the brush glide through the coat; if you feel resistance, adjust your technique or use a detangling product.
  • Alternate between brushing and combing to reduce repetitive motion in the same pattern.
  • Keep your wrist as neutral as possible and move from the elbow and shoulder instead of constantly flexing the wrist.

4.4. Tool Placement and Reach Zones

Ergonomics is not only which tools you choose, but where you put them. Constantly twisting or stretching for items creates unnecessary strain.

Design your workstation around a “reach zone” concept:

  • Frequently used tools (scissors, comb, brush, clipper) should all be within easy reach without turning your torso.
  • Use wall racks, magnetic strips or small trolleys to keep tools organized and close to hand.
  • Avoid storing heavy items low on the floor or high on shelves where you must bend or reach overhead.

5. Case Study: From Daily Pain to Sustainable Grooming

Let’s look at a realistic example of how ergonomics changes a groomer’s life.

Profile:

  • Name: Monika, 32 years old.
  • Experience: 4 years as a professional groomer.
  • Workload: 5 days a week, 4–6 dogs per day.

5.1. Before Ergonomics: The Problem Situation

Monika’s symptoms:

  • Daily lower back pain, worse in the evening.
  • Numbness and tingling in the right hand at night.
  • Feeling exhausted after just a few large dogs.

Her workspace before any changes:

  • Fixed-height grooming table.
  • Standard office chair used for sitting.
  • Heavy handheld dryer with no stand or wall mount.
  • Scissors on the heavier side, used for most dogs.

5.2. The Changes She Made

Monika decided to treat her body as her main work instrument and made the following upgrades:

  • Invested in an electric-lift table, allowing her to adjust the height for small and large dogs, and to raise dogs when trimming legs and feet.
  • Switched to a saddle stool for detail work, alternating between sitting and standing several times per dog.
  • Added a stand dryer so she no longer had to hold a heavy dryer above shoulder height for long periods.
  • Upgraded to lighter, well-balanced scissors and scheduled regular sharpening to keep them efficient.
  • Introduced a short stretching routine for her wrists, shoulders and lower back between dogs.

5.3. Results After Three Months

Three months later, Monika reported:

  • Lower back pain reduced from daily to rare and mild.
  • The tingling in her hand disappeared.
  • She felt less drained at the end of the day and more focused.
  • Her average grooming time per dog decreased by around 10–15% because she moved more efficiently.
  • She felt confident that she could continue grooming long-term without sacrificing her health.

This case study illustrates a key point: ergonomics is not a theoretical concept. It has measurable effects on pain levels, speed, quality and career longevity.

6. The 12 Golden Ergonomics Rules for Groomers

Use these rules as a quick checklist and reminder. Print them, keep them near your station, and review them whenever pain or fatigue starts to creep in.

  1. Table height: Work at elbow level for body work. Never spend long periods bent over the dog.
  2. Lifting mechanics: Lift with your legs, not your lower back. Keep dogs close to your body.
  3. Reach distance: Place your most-used tools within arm’s reach so you do not have to twist or lean repeatedly.
  4. Lighting: Good, even lighting reduces the need to lean forward to “see better” and protects your neck and eyes.
  5. Micro-breaks: Take 3–5 minutes between dogs for simple stretches and wrist rotations.
  6. Footwear and flooring: Wear supportive shoes and, if possible, use anti-fatigue mats at grooming stations.
  7. Hydration: Drink water consistently. Dehydrated muscles cramp and fatigue more quickly.
  8. Drying ergonomics: Use stands or mounts for dryers to avoid holding them up for long periods.
  9. Sharp tools: Keep scissors and blades sharp so your joints do not work harder than necessary.
  10. Position changes: Alternate between sitting and standing multiple times during the day.
  11. Body awareness: If a particular position consistently causes pain, change the setup instead of ignoring the signal.
  12. Investment mindset: One high-quality ergonomic chair or table is worth more than many massage sessions after the damage is done.

7. Daily, Weekly and Monthly Groomer Wellness Program

Ergonomics is most effective when paired with basic strength and mobility work. You do not need to become a professional athlete, but you do need to maintain the “machine” you use every day – your body.

7.1. Daily Routine (5–10 Minutes)

  • Wrist circles and gentle stretches between dogs.
  • Neck mobility: slow, controlled rotations and side stretches.
  • Shoulder rolls forward and backward to release tension.
  • Two or three simple back stretches (for example, cat-cow, gentle forward fold with bent knees).
  • A brief breathing exercise to relax the nervous system (inhale through the nose, exhale slowly through the mouth).

7.2. Weekly Routine (15–20 Minutes, 2–3 Times Per Week)

  • Light strength training focused on core stability (planks, dead bugs, bird-dog variations).
  • Glute activation exercises to support the lower back (bridges, clamshells, step-ups).
  • Scapular stability work (band pull-aparts, wall slides) to protect shoulders.
  • Hip mobility drills to make bending and lifting safer and easier.

7.3. Monthly Routine

  • Check your equipment: is the table still stable, are wheels, clamps, and mounts working smoothly?
  • Reorganize your tools if you find yourself constantly stretching or twisting to reach something.
  • Take a posture photo from the side while grooming (with consent) to see whether your head and shoulders are aligned over your hips.
  • Evaluate your pain levels over the month; if pain is increasing, something in your setup or schedule needs to be adjusted.

8. Designing a Grooming Salon Layout with Ergonomics in Mind

Your overall salon layout can either support smooth movement and reduce stress, or create a constant obstacle course of twisting, stepping over hoses and walking unnecessary distances.

Key points for an ergonomic salon layout:

  • Think in terms of flow: bath → table → drying → finishing area. Arrange equipment so dogs and groomers move in a logical, short path without crossing back and forth.
  • Avoid placing heavy or frequently used items in corners or behind obstacles. Every extra step and twist adds up over time.
  • Keep electrical cords and dryer hoses managed to avoid tripping and awkward stepping patterns.
  • Use even, non-glare lighting to reduce eye strain and neck craning. Consider task lighting above grooming tables.
  • Reduce noise where possible; constant high noise can increase overall tension in the shoulders and neck through stress.

9. Advanced Ergonomics for Experienced Groomers

Once the basics are in place, you can refine your ergonomics even further with advanced strategies.

  • Train both sides of your body: whenever safe and practical, practice using tools with your non-dominant hand for lighter tasks to balance workload between sides.
  • Study your scissoring patterns: notice if you always angle your wrist the same way. Small adjustments can reduce strain.
  • Match tools to body type: smaller hands may need different handle geometry than larger hands. Your ideal scissors and clippers may not be the same as your colleague’s.
  • Manage stress: psychological stress leads to physical tension. Learning to recognize and release tension in your shoulders, jaw and hands can reduce pain even before equipment changes.

10. Groomer Ergonomics FAQ

Q1: Is back pain really avoidable in grooming?

While some fatigue is normal after a busy day, constant or growing pain is not inevitable. With proper table height, safe lifting techniques, regular breaks and basic strength work, most groomers can significantly reduce or eliminate chronic back pain.

Q2: I cannot afford an electric table right now. Is there anything I can do?

Yes. While adjustable tables are ideal, you can still improve your posture by:

  • Using platforms or low steps for small dogs so you do not bend as much.
  • Sitting on a stool for detail work instead of leaning forward from standing.
  • Raising the table on stable blocks for very tall groomers (with safety in mind).

Q3: How do I know if my scissors are ergonomic for me?

The best indicators are comfort and fatigue. If your thumb or wrist hurts after 10–15 minutes, the scissors may be too heavy, too long, or the handle shape may not suit your hand. Ergonomic offset or swivel handles and lighter blades often reduce strain.

Q4: How often should I take breaks during the day?

Short micro-breaks of 3–5 minutes between dogs are very effective. Use this time to stretch your wrists, shoulders and back, drink water and reset your posture. Long, uninterrupted grooming blocks of several hours without any pause are much harder on the body.

Q5: Is standing on hard floors really that bad?

Yes, over time. Standing all day on hard surfaces increases stress on your feet, knees, hips and lower back. Supportive footwear and anti-fatigue mats can dramatically reduce this load and are a relatively low-cost ergonomic upgrade.

Q6: Does strength training really help groomers, or is stretching enough?

Stretching is helpful for flexibility and short-term relief, but strength training is what builds long-term resilience. Strong core, glute and shoulder muscles protect your joints and spine from the demands of daily grooming work.

Q7: What is the first ergonomic change I should make if I can only change one thing?

For many groomers, adjusting table height, or upgrading to an adjustable table, has the biggest impact on back, neck and shoulder pain. If that is not possible, improving footwear and adding anti-fatigue mats is another highly effective first step.

Q8: How can I convince my employer to invest in ergonomic equipment?

Present ergonomics as a business investment, not a luxury. Show how reduced pain and fatigue lead to higher speed, better quality, fewer sick days and longer staff retention. An electric table or stand dryer often pays for itself through improved productivity and reduced injury risk.

11. Summary: Building a Longer, Healthier Grooming Career

Grooming is a demanding, highly skilled profession that deserves the same level of ergonomic attention and respect as any other physically intensive career. Back pain, wrist pain and shoulder problems are common, but they are not a mandatory part of the job.

By understanding the biomechanics of grooming, setting up your workspace wisely, choosing ergonomic tools, and committing to simple daily and weekly wellness routines, you can protect your body, maintain your energy and extend your career by many years.

Your hands, back and shoulders are your primary tools. Treat them with the same care and professionalism you bring to every dog and cat you groom. Ergonomics for groomers is not an expense – it is your long-term career insurance.

12. How Groomica.eu Can Support Your Ergonomic Journey

You do not have to figure out grooming ergonomics alone. At Groomica.eu we combine daily hands-on grooming experience with a carefully selected range of professional equipment and tools designed to protect your health and improve your results.

From adjustable grooming tables and ergonomic chairs to efficient dryers, high-quality scissors, clippers and coat care products, we focus on solutions that help groomers work smarter, safer and more comfortably. Our goal is simple: to help you build a grooming setup that supports your body instead of wearing it down.

If you are not sure which table height range is best for you, what kind of saddle stool to choose, or how to upgrade your salon layout in a more ergonomic way, you can always reach out to us. We are happy to share practical advice based on real salon experience, not just theory.

Whether you are setting up your first grooming space or optimising a busy salon, Groomica.eu is here as your long-term partner – for equipment, for education and for a healthier, longer grooming career.


Read more grooming guides

Login

Forgot your password?

Don't have an account yet?
Create account